Our inspiration for the dining room walls came from this picture found here
We wanted to try a different type of wainscoting look than the already made board you can get at any home improvement store. This seemed like a winner!
Here is a before picture of what we were working with:
Our to do list:
- Remove the chair rail
- Remove the existing exterior doors and replace with interior french doors that open on both sides
- Add some DIY board and batten/ different type of wainscoting
- Replace ceiling fan to a light fixture
- Paint the walls gray
- Window treatments
That was the only door that opened
puttying the walls to fill in where the old chair rail use to be
Removing the old set of doors
Took some muscle!!
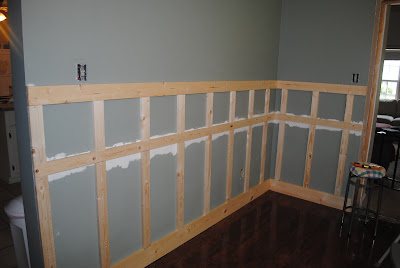
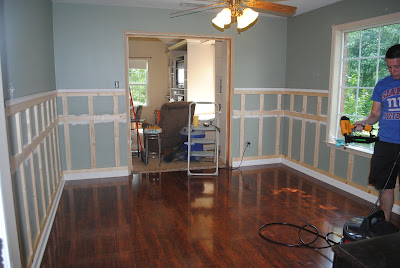
This room was not a "hard" project; it just took a lot of time.Basically the trick to this is that you make it LOOK like wainscoting after you paint it. Really it is just a bunch of 1 x 3's nailed to the wall. We painted the boards and the wall that was left exposed inside each square the same color, separating it from the rest of the wall.
Nailing the boards in place
Making sure they were spaced evenly
The top part completed
then added the bottom
We also added crown molding to the top to give it a better look.
Added the new doors to make sure they fit. Then we took them out to paint them too.
progress!
I had to paint 3 coats on this. 1 coat primer, 2 coats paint. We used Simply White by Benjamin Moore.
Painting the doors. We could have ordered them already painted but it made the price jump WAY up. No thanks, we'll do it ourselves!
AFTER:

Doors open in the first 2 shots
Doors closed
Doors closed
I know you can see into the living room, don't worry- before and afters are coming for that room too! We love how the dining room turned out!
We aren't completely done yet. Our to-do list has shrunk drastically though :)
Remove the chair railRemove the existing exterior doors and replace with interior french doors that open on both sidesAdd some DIY board and batten/ different type of wainscoting- Replace ceiling fan with a light fixture
Paint the walls grayWindow treatments
Table and benches: Antique store
Hutch: antique store
Chevron curtains: I made them
Old tool box,mason jars, old window: antique store
Twine cross: handmade but I sell them on my etsy store
Small grey distressed table: Garden Ridge
James and Hannah


No comments:
Post a Comment