Sunday, September 15, 2013

Dining Room Before and After

The first rooms we tackled in the new house were the living and dining room. They already had laminate floors so we really just needed to paint and adjust some things, instead of worrying about demoing an entire floor.

Our inspiration for the dining room walls came from this picture found here
We wanted to try a different type of wainscoting look than the already made board you can get at any home improvement store. This seemed like a winner!

Here is a before picture of what we were working with:


Our to do list:
  • Remove the chair rail
  • Remove the existing exterior doors and replace with interior french doors that open on both sides
  • Add some  DIY board and batten/ different type of wainscoting
  • Replace ceiling fan to a light fixture
  • Paint the walls gray
  • Window treatments
First we removed the chair rail and the old doors. The doors were an exterior set that use to go to a back deck before my parents added on to the house. Only one side opened. The doors are a nice feature because it blocks a lot of unwanted noise to the front of the house. We liked the idea but wanted a more updated look, and doors that opened on both sides.

That was the only door that opened

puttying the walls to fill in where the old chair rail use to be


Removing the old set of doors

Took some muscle!!

This room was not a "hard" project; it just took a lot of time.Basically the trick to this is that you make it LOOK like wainscoting after you paint it. Really it is just a bunch of 1 x 3's nailed to the wall. We painted the boards and the wall that was left exposed inside each square the same color, separating it from the rest of the wall.
Nailing the boards in place

Making sure they were spaced evenly

The top part completed

then added the bottom

We also added crown molding to the top to give it a better look.

Added the new doors to make sure they fit. Then we took them out to paint them too.

progress!

I had to paint 3 coats on this. 1 coat primer, 2 coats paint. We used Simply White by Benjamin Moore. 

Painting the doors. We could have ordered them already painted but it made the price jump WAY up. No thanks, we'll do it ourselves!


AFTER:


Doors open in the first 2 shots


Doors closed

Doors closed

I know you can see into the living room, don't worry- before and afters are coming for that room too! We love how the dining room turned out!

We aren't completely done yet. Our to-do list has shrunk drastically though :)
  • Remove the chair rail
  • Remove the existing exterior doors and replace with interior french doors that open on both sides
  • Add some  DIY board and batten/ different type of wainscoting
  • Replace ceiling fan with a light fixture
  • Paint the walls gray
  • Window treatments
 Where we got everything:

Table and benches: Antique store
Hutch: antique store
Chevron curtains: I made them
Old tool box,mason jars, old window: antique store
Twine cross: handmade but I sell them on my etsy store
Small grey distressed table: Garden Ridge

James and Hannah


Wednesday, September 11, 2013

13 Weeks

Today the baby is 13 weeks in the making! AND now starts the second trimester! I have been reassured that this is the trimester of glory and I really hope so. If I could just make it through the day without feeling like I still work night shift that would be GREAT! I also have a lot of pain in my left hip (which is normal, just annoying) when I walk my dog. The doc gave me some exercises that will hopefully help. I'm just glad it doesn't bother me at kickboxing. 


The coolest thing about the 13th week is that the baby developed vocal cords! So neat! Maybe he/she will be able to carry a tune! James says he keeps catching me rubbing or holding my stomach more. I guess because there is actually starting to be something to touch :) I am so curious to know if this baby is a boy or girl...5 more weeks and we will know! At first I really wanted a girl, but the more I think about it..I would have so much fun with a boy too! We have names picked out but don't ask because I'm not telling :)

Hannah

Monday, September 9, 2013

Baby Bowen :)

We have officially spilled the beans about the baby! Baby Bowen will be here in March!!!!!!
We are really really REALLY excited! We have been taking a weekly bump picture with some updates on a chalkboard to keep our families in the loop. Now that it's not such a big secret I can post them on here in the future too instead of just texting them. haha Sorry for all the family/friends that had to keep the secret!
Never attempt to use a self timer when you have a hyper dog...James' dad saved the day on this one when we finally called him to come take this for us :)

AHHHHH!!

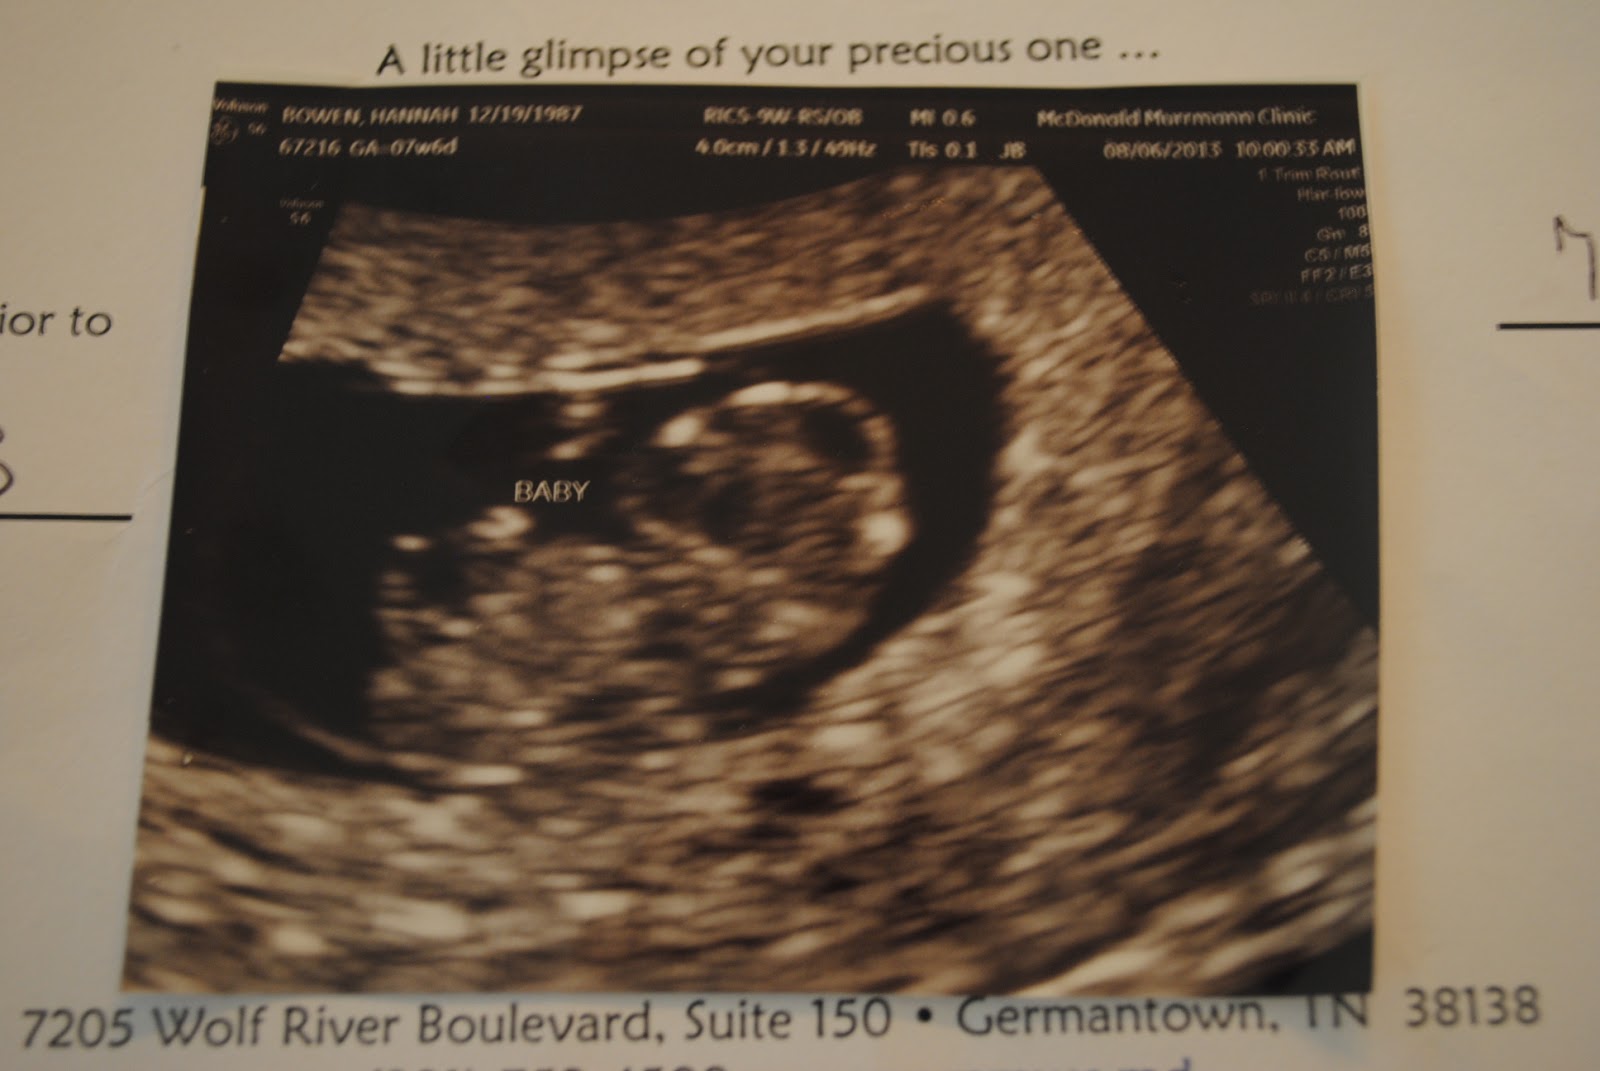
first ultrasound, 7wks 6days
My response was "there really is a baby in there!!"


Yay for tiny bump! In person I just look like I eat a lot of doughnuts

So far everything has gone really smoothly. I get asked a lot about morning sickness. I was super nauseated from weeks 6-8 then it got better. As long as I eat right away in the morning, and eat a small something between meals I am good. Other than that, my back hurts easily and I get headaches quite a bit. I'm thankful for my awesome workout buddy and that I'm still going to kickboxing regularly. That's a plus! That baby is going to come out kicking! I hope when I'm like 30 weeks I'm still going...I'll let you know when to start laughing.  It was so neat to hear the heartbeat last week. I was also relieved to hear it to. It is so hard to go 4 weeks without knowing if everything is ok! First time pregnancy jitters I guess! In the future I will only post one pic at a time. These just got built up because we weren't telling everyone right away. I look forward to Wednesdays now so I can see myself if my body has changed any more than the last week. :) 

Oh and because bloopers are always the best...enjoy these. James and I attempting to take the first photo with a self timer...Penny is definitely giving us a taste of what it is probably like to have a 2 year old at times.

I'll hide back here

where am I suppose to look?

bird?

oh hey guys, what are you doing back there?

Hannah

Coming soon:

Week 13 picture
Before/after/progress of our house
Pictures from summer

It's been a long time...

It's been a very long time since I have written a post on here! It is way overdue! I found blogging to be hard to commit to. Seeing as life is full of surprises, I think James and I are in a really neat part of life worth making this more of a commitment. My parents recently moved back "home" to Wisconsin. This means my family is officially split up in all different locations. Sarah (my sis) and Nat are still in Knoxville, and T.J. (bro) and Sue Ann are in Mississippi. James siblings also have left the Memphis area, plus all of our extended family is far away. That's a lot of people to live away from! Just in the past few month we have sold our first home, bought our second (which is my parents old house), and found out I am pregnant with baby #1. With all the renovations we are doing to the new house and with a baby on the way, there is a lot of updating to do. This may be a good place to keep up :)

Before mom and dad made their big move, James and I were all set to move to Texas for a job offer he took with his old company. And like life tends to do us, everything changed at once and super fast! Our first house had only been for sale a little shy of three weeks when we received an offer. In the same day he was offered a completely different job, different company. BIG DECISIONS ARE NO FUN. Can I get an amen?! Sheesh. As much as I wanted to just sit on the situation, ponder, change my mind a few times, make a list of pros and cons maybe...There was no time. The offer on the house was a really strong offer, and so was this out of the blue job offer. James still had to go through the hiring process so we really couldn't find peace with turning the house offer down, not knowing if the new job would pull through. So we speed prayed (made that up) for peace, an answer, the right direction. We had about 1 day to decide to sell our house or not.

God is faithful and His peace is beyond understanding. The fact that James and could come to the same decision with absolute peace in both our hearts was from Him, without a doubt. The decision was to go ahead and sell our house. Sad day but it was ok! Sometime after we found out the new company was a better choice than a move to Texas. We would be able to stay in Memphis, but our first home was now under contract. The new buyers wanted it pretty fast so we had about a week to move everything out before our cruise in June. We closed as soon as we got back. Where are we going to live now?!?!

I had joked with my dad over the past couple years when he talked about selling their house. How much will you sell it to me for? I was half serious. At the time I just hated to see it go to another family, but knew it was inevitable when they bought their new home in Wisconsin. Well, it fell into place perfectly that they were moving to Wisconsin this summer. Dad was putting the house up for sale when we were back from the cruise. This time, not joking, we told my dad we wanted to buy it from him. It made so much more sense for us to do this then go through the stress of house hunting again. We love my parents house and it was in a much more affordable area than where we were. I want to stay home with our kids when we have them and this was going to make it much easier on us. SO...that is basically how we came to own my parents (old) house.


More updates coming!

Hannah


Friday, July 20, 2012

DIY Centerpieces

Another DIY project on the list for Sarah and Nat's wedding was centerpieces. James was more than happy to sit this one out since no cool tools were involved. We used Pinterest for some inspiration, hoping  to keep it inexpensive and something that could be a DIY project. Sarah found some ideas that were very simple to do. For example: 
The main plan was to tie in lace, burlap, and floating candles. I like things in odd numbers though for jars so we had to add another element besides the first two ideas! It worked out perfectly because I ended up tying in some yellow! Keep reading to see!
We needed at least 18 of each set for the tables. We bought the mason jars from WalMart that come in a pack of 12 (super cheap). Nat's mom got me the burlap ribbon in East TN (I believe Hobby Lobby finally sells it now), and the lace came from Hobby Lobby (when ribbon was 50%). I went ahead and made 24 settings just in case we had any mishaps on the drive to Knoxville.
The largest Jar was made for flowers. I made those early so Sarah could get them to the florist a couple weeks before the wedding. All I used was burlap ribbon (a new favorite item), lace ribbon, and a glue gun. That picture is from my phone so sorry about the bad lighting.
Next step were making it a trio. I did the small jars (right) next and tied them with twine (Hobby Lobby), filled them with clear stones, filled with water, and put a floating candle on top. I originally started with brown raffia. I ran out  and went to WalMart to see if they had any. To my surprise, they had YELLOW! It was perfect to tie in to her colors! So I used medium jars (left) and tied them with raffia. Then I tied them with yellow raffia and put a candle in them.


This is what they would look like lit, and imagine flowers in the big jar. Don't mind mom in the back...there was some serious coin rolling going on while I was working away. :)

Don't worry, the bride did help fill the jars with stones :)

And there we have it....


Photo by Sarah Pascutti 

The finished project!!

-Hannah


DIY Cornhole Boards

Last month my sister got married! To get ready for the big day, James and I had a To-Do List for the DIY wedding! Our first project was two pair of cornhole boards. The whole event was outdoors so Sarah and Nat wanted something for people to do in the good weather. James did most of this project and he did a great job! He used the dimensions/plans from here. It was easy to follow and we have some pictures to share of the progress. I don't have the best pictures of each step because he worked on them the nights I was at work. Once he gets his tools in hand there is no stopping for pictures unless I'm stalking him with a camera. So here are some of the shots I did get!
Here the main boards are already cut out and painted with the base colors. He got all the supplies from Lowe's. Their wedding colors were grey and yellow so we coordinated.

 
We taped off the stripes we wanted to keep grey and painted the others yellow.


The finished Chevron and polka dots. I painted the polka dot boards by taking a bowl and tracing a bunch of circles over the boards. I used one of those black sponge brushes to paint the holes in- it kept it streak free.


Here are some pics of the boards at the wedding, they were a big hit!
Photo by Sarah Pascutti

Photo by Sarah Pascutti


Highly recommend for any outdoor event! Happy building :)
-Hannah